
Improved Security: 2 Factor Authentication & Device Detection
As part of continuous improvements to ensure eTrack is secure, we have introduced Two Factor Authentication.
Each user logging on is prompted for a 6 digit code that is emailed. The email address is in the Email 1 field of Staff Details. You can edit these by selecting staff under Resources/Current Staff.
Each user can only log in from two multiple devices. If you attempt a third you will be prompted to replace one of the others. This will help protect misuse of your login.
Track PACE Participants (D656A)
At the very top of the Contacts tab of a Participant you will see a field ‘NDIS System’.
It will default to My Place (ie. Proda) but allow you to change it to PACE.
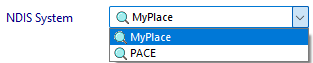
The Participant, Personal, Plan and Time tabs all show the ‘NDIS System’ field so it can be used for grouping and filtering.
Invoice Tab speed up
The Invoices tab on Active Participants etc now runs much faster
If you track payments in eTrack please email [email protected] requesting the ‘Unpaid Invoices’ tab to be added quoting E#2066.
Invoice Tab speed up
The My Tasks tab defaults to Tasks that don’t have Done ticked and are either overdue or due in the next 7 days. eTrack also now excludes Tasks that are on Inactive or Deleted Plans, are a Task Header or part of a Template.
Tasks are now ordered by Due Date with newest at the top.
Task Management in the eTrack APP has been made much more usable by also reflecting the above.
Editing Agency Managed Time
In the same way Invoiced time booked to Plan and Self-Managed Participants can’t be edited or deleted, so time booked to Agency Managed Participants included in a Bulk Uploads is now protected from being changed.
An Exported Flag is set on all time and expenses that are included in a Bulk Upload and have an Upload#.
To edit, move or delete time or expenses first clear the Upload # as follows….
Clear Upload #
To clear the Upload # on time booked to Agency Managed Plans…
- Select a Participant
- Click NDIS Upload tab
- Click View button and select Default View
- Optionally filter the rows as follows:
Click Dates button and select a date range (can be 1 day)
Type a date or staff name into the Search box
Click v in the Date column header to select specific dates
Click v in the Staff column header to select specific staff - To clear the Upload # for one row, right click on the row to be cleared and select Clear Upload #
- To clear the Upload # for all displayed rows, click the Clear Upload # button at the top.
Editing Time Help (D633)
There are various reasons why time and expenses can’t be edited or deleted.
When you click the bold green hours in a Case Note to display the Edit Time dialog, if any relevant flags are enabled you’ll see Status that if clicked will show you relevant help from the following.
Inactive
Time booked to an Inactive plan can’t be edited to prevent more time being booked. The time can be deleted. To make a Plan Active, select the Plan and click the green Active button top right.
Approved
Time can’t be booked if Approved. To Unapprove time, select a staff member, select Timesheet screen, go to the week start date and change the Status from Approved to Draft.
OR right click on a Staff member, a Participant or a Plan and select NDIS Tools->Update Timesheet and Expense Status.
Locked
Time can’t be booked if Locked. To Unlock time, select a staff member, the Timesheet screen, go to the week start date, click Unlock button.
OR right click on Staff member or Participant or Plan and select NDIS Tools->Update Timesheet and Expense Status.
Invoiced
Invoiced Time can’t be changed. To remove the Invoiced flag for Plan or Self-Managed Participants, delete the Invoice in the Invoice screen. If the invoice has been exported, first clear the Batch # and ensure you update the accounting system to match.
Uploaded
Time included in a Bulk Upload with an Upload # can’t be changed. To remove the Upload # for Agency Managed Participants, select the Participant and select the NDIS Upload Tab.
Either right click and select Clear Upload # which will clear just the selected row,
Or filter the rows to display those you want to clear and click Clear Upload # Button at the top that will clear the Upload # from all displayed rows.