
If you are NDIS registered and have Agency Managed Participants then eTrack can be used to prepare an ‘NDIS Upload’ .csv file.
Key Features
- Simple intuitive interface with one ‘NDIS Upload’ tab for one or all Participants.
- A unique Upload # is assigned to all Service Dates in the NDIS Upload file. This allows easy and accurate retrieval of Booked Time and KM etc.
- You may Repeat an upload with overlapping dates without uploading the same Service Dates twice.
- Upload Filename includes the Upload # and date range for easy auditing.
User Guide
- Select Active on the left or a Participant
- Click ‘NDIS Upload tab. This looks like the old NDIS Check tab that no longer exists.
- Pick a date range (this CAN be a date range you have used before).
Optionally click Analyse and further filter the rows to display the ones you want to include. - Click ‘NDIS Export’ button.
This will create the .csv file in the correct format and assign a unique Upload # to each row.
All displayed rows that don’t have an Upload # will be included.
Do not use the Export button as this will be in the wrong format, eTrack will warn you!

- The Filename created now includes the Upload #. Due to the NDIS limit of 16 characters there isn’t room for the year to be displayed twice, so have chosen this format…
<Upload# >-<from date mm/dd>-<to date mm/dd><Initials>.csv
Where
<Upload#> starts with the year followed by a sequential number, eg 2301
<Initials> are those of the selected Participant’s or the first letter of the Participant Status Group, eg A for Active
For example:
2301-0101-3101JS.csv = Upload #1 from 01/01/23 to 31/01/23 for John Smith.
2302-0101-3101A.csv = Upload #2 from 01/01/23 to 31/01/23 run from Active Participants.
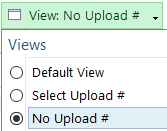
- To display entries from a previous Upload, click Views button and tick ‘Select Upload #’ and enter a number like 2301
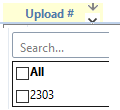
- Alternatively click the v in the Upload # column and tick the Upload # you require.
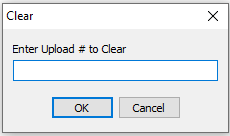
- To Clear an Upload # from all Service Dates (not just displayed ones), click ‘Clear Upload #’ button and enter the Upload # like 2301 to clear.
- To export to PDF and other formats click the Export… button as before.
Do not use the Export button to create a csv file for the NDIS portal.